
USB Condenser Mic + Tripod: Clean Voice Setup Tips
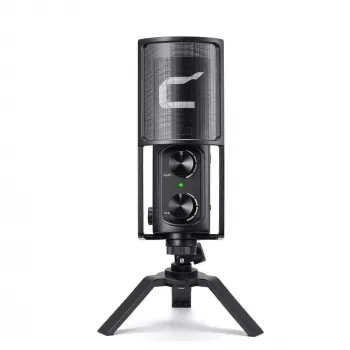
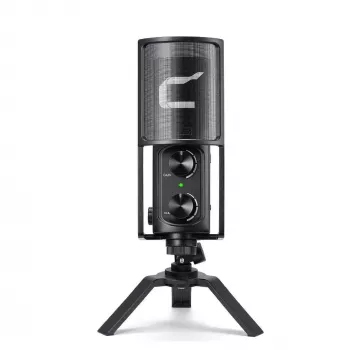
USB Condenser Microphone with Tripod Stand
A USB condenser microphone with a compact tripod stand is a practical way to get clearer voice audio for meetings, streaming, podcasts, voiceovers, and music demos—without extra interfaces or complicated wiring. Because it connects directly to a computer over USB, setup is usually quick, but getting truly clean sound still comes down to placement, levels, and a few simple room tweaks.
What It’s Good For
- Video calls and online classes: Clearer speech than most built-in laptop mics when positioned close to the mouth.
- Streaming and gaming chat: More consistent voice level and less room noise when you keep a steady mic distance and don’t overdo the gain.
- Podcasts and voiceovers: Condenser mics capture detail and articulation, especially when used close and slightly off-axis in normal rooms.
- Song demos and acoustic instruments: Captures high-frequency detail; best results come from careful placement and managing room reflections.
For general placement ideas used across many mic types, Shure’s overview is a solid reference: Shure — Microphone Techniques.
Key Features to Look For in a USB Condenser Mic with Tripod
- Plug-and-play USB connection: No audio interface required, which is ideal for laptops and desktops where simplicity matters.
- Condenser capsule sensitivity: Great for capturing vocal detail, but it will also “hear” more of the room—distance and gain control are key.
- Tripod stand stability: A wider stance helps prevent desk bumps from transferring into recordings.
- On-mic controls (if included): Mute, gain, or headphone monitoring can speed up workflow during calls or recording sessions.
- Build and mounting options: Standard threading makes it easier to move from a tripod to a boom arm later.
Quick Setup for Clean Voice Audio
Small adjustments make a big difference with condenser mics. Prioritize a close, consistent position before reaching for software fixes.
Placement and Settings Cheatsheet (Speech)
| Goal | Distance | Angle | Suggested Input Level | Notes |
|---|---|---|---|---|
| Reduce room echo | 6–8 in (15–20 cm) | 20–45° off-axis | Moderate | Closer mic + lower gain beats far mic + high gain |
| Reduce plosives | 8–10 in (20–25 cm) | 30–45° off-axis | Moderate | Add pop filter if possible |
| Minimize keyboard noise | 6–8 in (15–20 cm) | Slightly above mouth line | Low–moderate | Keep mic in front of mouth, not near the keyboard |
| More natural tone | 8–12 in (20–30 cm) | Near on-axis | Moderate | May pick up more room sound; treat reflections if needed |
How to Get Better Sound in a Normal Room
If you use Audacity for basic recording and level checks, its setup notes are a helpful reference: Audacity Manual — Recording.
Compatibility and Everyday Use
Common Problems and Fast Fixes
- Sound is too quiet: Increase the input level in system settings or the app. Before raising gain a lot, move the mic closer and speak slightly across the capsule rather than straight into it.
- Distortion or clipping: Reduce input level; increase distance slightly; avoid speaking directly into the capsule. If your app has automatic gain control, test it on/off to see which is cleaner.
- Echo and reverb: Move closer, lower gain, and add soft materials nearby. If you hear a delayed “loop,” turn off “listen to this device” monitoring in OS settings (it can cause feedback-like doubling).
- Buzzing or digital noise: Try a different USB port, avoid unpowered hubs, and keep the cable away from power bricks and monitor cables.
- Audio drops or not detected: Reconnect the mic, restart the app, and set the microphone as the default input device. For deeper OS troubleshooting, see Microsoft Support — Fix sound or audio problems in Windows.
Product Option
If you want a straightforward desk setup, the USB Condenser Microphone with Tripod Stand is designed for easy USB connection and stable placement for voice recording and communication. Best results typically come from close placement (6–10 inches), a slight off-axis angle, and conservative gain settings.
More In-Stock Picks
- Alviero Martini Prima Classe Women’s Beige Bag with Zip
- Cactus Cat Tree Tower with Scratching Post & Condo Nest
Before choosing, compare the product details with your daily routine, available space, care needs, and preferred setup. The strongest option is usually the one that fits the intended use clearly and remains simple to clean, store, and check before repeat use.
FAQ
Do USB condenser microphones work with Windows and Mac without extra drivers?
Most USB condenser microphones are class-compliant, meaning Windows and macOS recognize them as standard USB audio devices without extra drivers. After connecting, select the mic as the input in your system sound settings and inside the app you’re using.
How far should the microphone be from the mouth for clear speech?
A reliable starting range is about 6–10 inches. Keeping the mic closer lets you use lower gain, which usually reduces room echo and background noise; angling the mic slightly off-axis also helps tame plosives.
Why does a condenser mic pick up so much background noise?
Condenser microphones are sensitive by design, so they capture room reflections and quieter sounds more easily than many built-in mics. Move closer, lower the gain, reduce nearby noise sources, add soft furnishings to cut reflections, and minimize desk vibration to keep the recording focused on your voice.














Leave a comment