Layered Texture Tablescape Checklist for Any Style
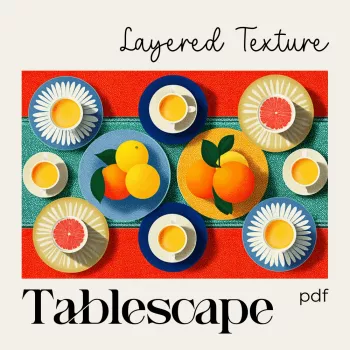
Layered Texture Tablescapes: A Step-by-Step Checklist for Cozy, Rustic, Modern, and Elegant Looks
A memorable tablescape feels intentional without feeling fussy. The secret is layered texture: a clear base, repeatable material choices, and a few “hero” moments that catch the eye. Use the checklist below to build depth—linens, ceramics, glass, wood, metal, greenery, and candlelight—then adapt it to cozy rustic, clean modern, or classic elegant styles.
Start with the basics: purpose, guest count, and sightlines
- Define the occasion and meal format. Plated dinners need more open space per setting, while family-style needs center “lanes” for shared platters.
- Count place settings and measure your tabletop. Plan for comfortable elbow room so chargers, glasses, and serving pieces don’t collide.
- Set a height rule for the center. Keep most décor low so guests can see across the table; place taller pieces at the ends or in an off-center cluster.
- Choose a simple color plan. Stick to 2–3 main tones plus one accent so the mixed textures read layered, not busy.
Step-by-step checklist: layer from largest to smallest
- Base layer: Add a tablecloth, runner, or placemats. This largest textile sets the mood and softens hard surfaces.
- Foundation layer: Place chargers or larger plates to create a visual frame under dinnerware.
- Core layer: Stack plates and bowls with slight contrast (matte + glossy, stoneware + porcelain, neutral + patterned rim).
- Textile layer: Fold napkins with intention (casual drape for cozy, crisp rectangle for modern, soft knot for rustic, structured fold for elegant).
- Utility layer: Add cutlery and glassware; repeat finishes (all brushed, all polished, or one intentional mixed-metal rule).
- Glow layer: Add candles (tapers for height rhythm, votives for sparkle). Keep flames away from loose fabric and greenery and follow NFPA candle safety guidance.
- Organic layer: Add greenery, seasonal stems, fruit, or herbs; repeat the same botanical shape to reduce visual noise.
- Detail layer: Finish with place cards, small favors, or a single statement object per setting (mini bud vase, menu card, or textured bread plate).
- Edit pass: Remove 10–20% of small items. Negative space makes textures read more clearly.
Layered Texture Tablescape Checklist (Quick Reference)
| Layer | What to Add | Texture Goal | Common Mistake to Avoid |
|---|---|---|---|
| Base | Tablecloth/runner/placemats | Soft foundation and color field | Too many competing patterns |
| Foundation | Charger or large plate | Frame each setting | Overly wide chargers on a small table |
| Core | Plates/bowls | Shape + finish contrast | Stacking tall, unstable piles |
| Textile | Napkins, rings/ties | Warmth and tactile interest | Bulky rings that fight the cutlery placement |
| Utility | Cutlery + glassware | Consistency and sparkle balance | Mixed finishes without a rule |
| Glow | Tapers, votives, tea lights | Depth and evening ambiance | Centerpieces too tall or candles too close to stems |
| Organic | Greenery, flowers, fruit, herbs | Natural variation + freshness | Strong scents near food (heavy lilies, intense eucalyptus) |
| Detail | Place cards, menus, favors | Personal touch and polish | Too many small trinkets cluttering the plate area |
Layering tips that make any table look intentional
- Repeat one texture at least three times. Linen, ribbed glass, hammered metal, or raw wood becomes a “through line” that feels designed.
- Mix matte and shine. Matte stoneware + glossy glassware (or polished flatware) prevents the table from looking flat in photos and in candlelight.
- Vary shapes, not just colors. Round plates with angular cutlery, cylindrical candles with organic greenery, or square napkin folds against curved bowls.
- Use “tight + airy” contrast. Cluster votives for density, then leave open runner sections for breathing room.
- Keep patterns in one zone. If plates are patterned, keep linens solid; if the runner is bold, choose calm dinnerware.
Style recipes: cozy rustic, modern minimal, and elegant classic
Centerpiece structure that won’t block conversation
- Pick a layout that behaves: a low garland down the center, a trio of clustered vases, or a repeating line of small bud vases.
- Build in heights: lowest (greenery), mid (votives, fruit), highest (tapers or a few taller stems placed at ends).
- Anchor it visually: place the arrangement on a runner, tray, or series of small dishes so it reads as one composition.
- Keep fragrance mild and food-friendly. Prioritize visual texture over strong scent, and use classic table-setting spacing as a baseline (see Emily Post table setting basics).
AI-assisted inspiration: generate ideas, then make them real
Common mistakes and fast fixes
Printable-friendly guide: the layered texture tablescape checklist
Helpful picks to make layering easier
- How to Create a Layered Texture Tablescape – Step-by-Step Checklist for Stunning Table Designs, Layering Tips & AI Inspiration for Cozy, Rustic, Modern, or Elegant Tables (digital guide that pairs well with the checklist above)
- Dolce & Gabbana Gold Charm Necklace with Carretto Pendants and Crystals (a gold-accent reference piece—use it as a palette cue for warm metallic touches like brass candleholders or gold flatware)
FAQ
How many layers should a tablescape have?
Aim for 6–8 layers: base textile, charger/foundation, plates/bowls, napkin detail, flatware + glassware, glow (candles), an organic element, and one finishing detail. Stop earlier if the table feels crowded or serving space disappears.
How can a table look layered without buying new décor?
Stack plates you already own, repurpose a textured throw as a runner, and use small jars as bud vases. Add fruit or herbs from the kitchen and repeat one finish (all clear glass or all brushed metal) so the mix feels cohesive.
What’s the easiest centerpiece for a long table?
A low greenery garland with spaced votives is the simplest option. It’s quick to build, keeps sightlines open, and looks rich because the same textures repeat down the length of the table.










Leave a comment