Waterproof 3D Peel-and-Stick Backsplash Tile for DIY
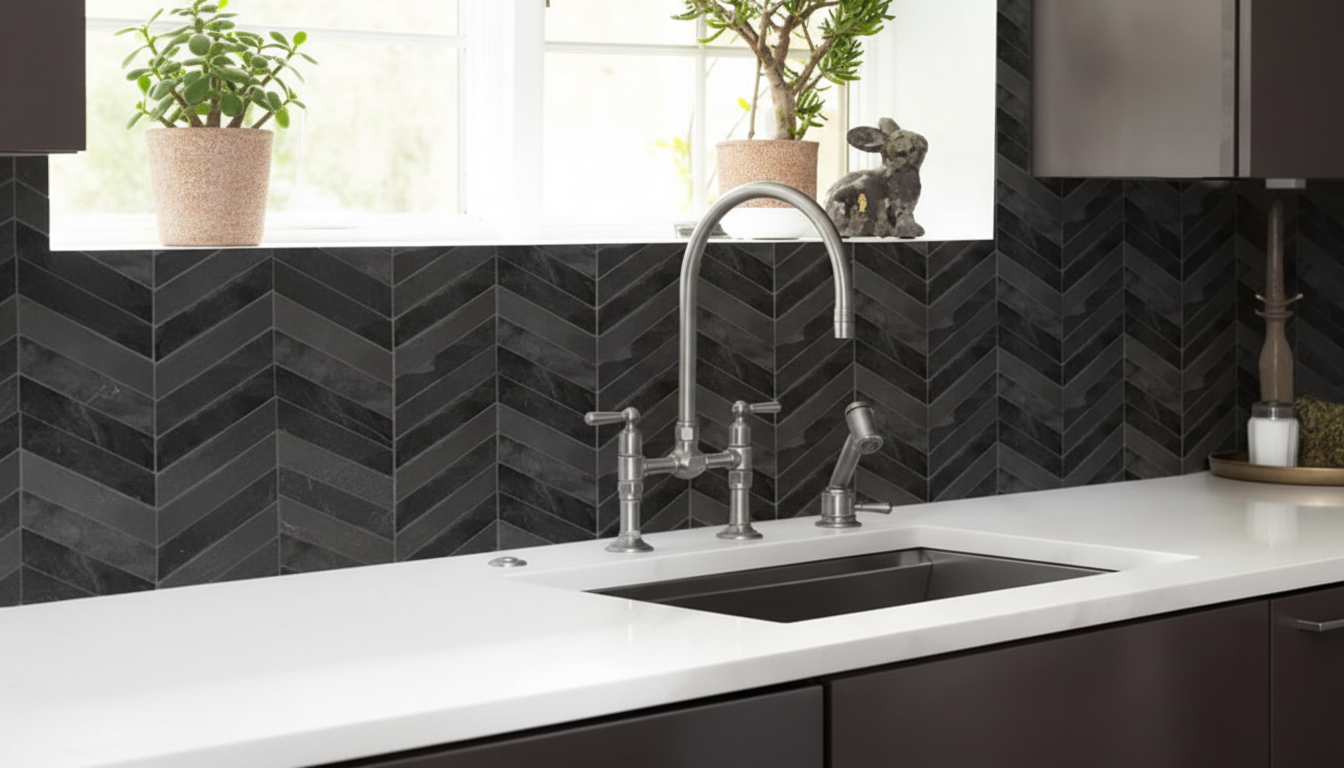
Durable Self-Adhesive 3D Peel and Stick Backsplash Wall Tile – Waterproof for Kitchen & Bathroom
A fast, budget-friendly way to update a kitchen or bathroom wall is to add a textured backsplash that handles everyday splashes and wipes clean without fuss. A peel-and-stick 3D wall tile brings that “finished” look with minimal tools, making it a popular DIY option for weekend makeovers, rental-friendly upgrades, and quick refreshes behind sinks, counters, or vanity areas. Because the surface is slightly raised, it can also help distract from small wall flaws and add depth that flat paint can’t match.
What Makes a Peel-and-Stick 3D Backsplash Practical
Traditional tile looks great, but grout, thinset, and cure time can slow projects down. Peel-and-stick 3D tiles focus on speed and simplicity while still delivering a decorative, dimensional finish.
- Creates a raised, dimensional look that can mimic classic tile patterns without grout lines.
- Self-adhesive backing streamlines installation for rentals, quick remodels, and weekend projects.
- Water-resistant surface supports splash zones in kitchens and bathrooms when properly applied to a clean, dry wall.
- Helps visually define functional areas like the space behind a stove, sink, or vanity.
If you want an easy starting point, the Durable Self-Adhesive 3D Peel and Stick Backsplash Wall Tile – Waterproof for Kitchen & Bathroom is designed for simple application and a more layered, high-end look than flat panels.
Best Places to Use It (and Where to Avoid)
Peel-and-stick tiles perform best when they’re treated like a “splash and wipe” surface—not a substitute for full waterproof building systems.
- Good fit: kitchen backsplashes, laundry room walls, bathroom vanity backsplashes, accent strips, RV or camper interiors with smooth wall panels.
- Use caution: direct high-heat zones (too close to gas burners or open flames); confirm safe clearance and consider a heat shield if needed.
- Avoid: heavily textured walls, peeling paint, dusty surfaces, raw brick, or areas with persistent steam condensation unless ventilation is improved.
- Not a shower system: not a substitute for waterproofing systems in shower interiors; use purpose-built shower wall materials for wet-room exposure.
For heat awareness and safe cooking habits around ranges, review guidance like NFPA cooking safety, especially if you’re planning a backsplash close to a cooking surface.
Key Features to Look For in a Durable Self-Adhesive Tile
Not all peel-and-stick tiles behave the same once steam, wiping, and daily life get involved. A few practical details make a big difference long term.
- Adhesion strength: works best on sealed, smooth, non-porous surfaces (painted drywall in good condition, sealed tile, metal, glass).
- Water resistance: protects against splashes and routine wiping; edges should be firmly pressed to reduce water intrusion.
- 3D face durability: resists scuffs and everyday abrasion; choose a finish that suits cleaning habits (matte can hide smudges; glossy can brighten small rooms).
- Trim and fit: easy-to-cut material simplifies outlets, corners, cabinet edges, and tight backsplash runs.
Even a strong adhesive can fail if it’s applied over grease film near a stove or soap residue near a vanity. When moisture and ventilation are concerns, follow reputable cleanup and prevention resources such as the EPA’s mold cleanup guidance and the CDC’s mold prevention and cleanup information.
Quick Spec & Planning Checklist
A little planning keeps the install looking intentional—no awkward slivers at corners, crooked rows, or gaps around outlets.
- Measure the backsplash area (height × length) and add extra for cuts, outlet boxes, and pattern matching.
- Plan the starting line: a centered layout can look balanced; starting from one end can reduce small slivers at corners.
- Decide edge finishing: consider corner trims, end caps, or a clean caulk line for a built-in look.
- Check that paint is fully cured and the wall is grease-free before sticking tiles.
Backsplash Planning Table
| Item to Confirm | Why It Matters | Quick Tip |
|---|---|---|
| Wall surface condition | Adhesive bonds best to smooth, stable surfaces | Patch holes, sand ridges, and wipe dust before installation |
| Moisture and ventilation | Reduces edge lifting and mildew risk | Run the exhaust fan during and after showers/cooking |
| Heat exposure | High heat can weaken adhesives over time | Keep distance from burners; use a protective panel if needed |
| Cleaning routine | Harsh cleaners can dull finishes or degrade adhesive edges | Use mild soap and a soft cloth; avoid abrasives |
| Extra quantity | Cuts and mistakes happen | Add 10–15% more tiles than the measured area |
Step-by-Step Installation (Clean, Stick, Press, Seal Edges)
Most issues come from rushing the prep. Take time to clean thoroughly and keep your first row straight.
Care, Cleaning, and Long-Term Performance
Common Problems and Simple Fixes
Styling Ideas for Kitchens and Bathrooms
For a broader home refresh beyond walls, consider functional upgrades that complement the space. A neat, sculptural pet corner can also reduce visual clutter—like the Cactus Cat Tree Tower with Scratching Post & Condo Nest, which helps keep scratching and lounging contained in one spot.
FAQ
Will peel-and-stick backsplash tiles stay on in a bathroom?
They can hold up well in a bathroom splash zone when applied to a clean, dry, smooth surface with good ventilation. Sealing exposed edges near sinks with kitchen/bath caulk can help prevent moisture from creeping underneath.
Can these tiles be installed over existing tile or painted drywall?
They typically adhere best to smooth, sealed surfaces. Existing tile should be thoroughly cleaned (and sometimes lightly scuffed if very glossy), while painted drywall should be fully cured, clean, and free of peeling or chalky residue.
How close can a peel-and-stick backsplash be to a stove?
Adhesives can soften with high heat, so keep a safe clearance from open flames and high-temperature areas. For the hottest zones directly behind cooking surfaces, a protective panel or a different heat-rated material is often a better choice.








Leave a comment