22.2mm Lock-On MTB Grips: Anti-Slip, Shock Control
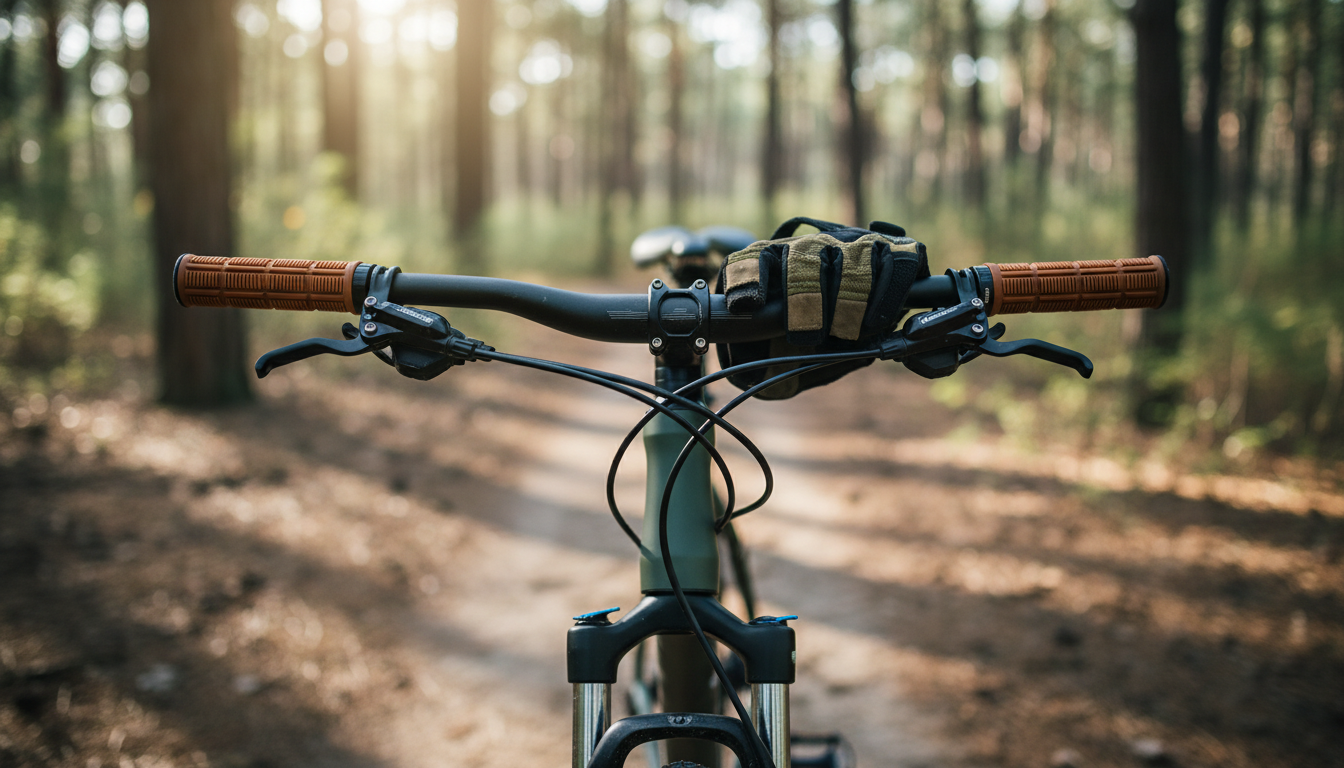
Mountain Bike Anti-Slip Shock Absorbing Lock-On Grips (22.2mm Universal): Comfort and Control on Rough Trails
Lock-on grips with a 22.2mm fit can make a noticeable difference when trails get rough: they help keep your hands planted, reduce annoying grip rotation, and add cushioning over repeated chatter. If you ride in wet weather, dusty conditions, or on high-vibration terrain like roots and rocks, a well-designed anti-slip, shock-absorbing grip can improve steering confidence and reduce the “death grip” that leads to fatigue. Below is a practical breakdown of what these grips are meant to solve, how to confirm fit, what to expect on the trail, and how to install and maintain them for consistent control. For more guidance, see Non Slip Scooter Grips Bike Handlebar Grips Single Lock-On.
What these lock-on grips are designed to solve
Grip twist and creep under pressure
Traditional push-on grips can rotate when you’re braking hard, pulling on the bars during steep climbs, or muscling the bike through a corner. Lock-on grips use clamp rings to mechanically secure the grip to the handlebar, reducing unwanted movement when your hands are working the hardest. For further reading, see E-bike Repair and Maintenance Instructional Modules 40 ….
Hand fatigue from vibration
Trail “buzz” adds up—especially on washboard gravel, rock gardens, and long descents. Shock-absorbing materials and slightly thicker profiles can help soften repeated small impacts so your hands don’t go numb as quickly.
Slips in wet, muddy, or sweaty conditions
Anti-slip textures and tackier compounds support steadier hand placement when gloves are damp, palms are sweaty, or fine dust reduces friction. Instead of constantly re-gripping, you can keep a consistent hold and focus on line choice.
Faster setup, removal, and maintenance
Lock-on designs are built for easy installation with an Allen key, and they typically remove cleanly—no glue, no compressed air tricks, and no cutting grips off the bar when it’s time to swap.
Fit and compatibility (22.2mm “universal” handlebars)
“22.2mm” refers to the standard outside diameter of the handlebar at the grip area on most mountain bikes, many hybrids, and plenty of flat-bar city bikes. Compatibility comes down to verifying that your handlebar’s grip section is actually 22.2mm and that your controls leave enough straight bar space for the grip body and clamp ring(s).
| Check | What to verify | Why it matters |
|---|---|---|
| Handlebar diameter | 22.2mm at the grip area | Ensures the grip seats correctly and clamps securely |
| Control spacing | Room for shifter/brake mounts plus clamp ring | Prevents interference and awkward hand position |
| Bar end style | Open vs closed ends; end caps included | Protects rider and prevents bar damage |
| Accessory fit | Mirror/light/bar-end mounts | Avoids clamp conflicts and end-cap removal issues |
End clearance is more important than it sounds. Riding with exposed bar ends can be unsafe and can damage the handlebar during a crash. If the grip includes end caps, make sure they seat firmly; if your setup uses bar-end accessories, confirm the grip’s end design and clamp placement won’t interfere.
Anti-slip texture and shock absorption: what to expect on the trail
Texture that resists micro-slips
Patterns like ridges, knurl-like blocks, and micro-dimples boost friction and help prevent tiny hand shifts under repeated impacts. That matters during braking bumps and chunky descents where even small slips can lead to over-gripping and faster fatigue.
Compound feel: tacky vs direct
Softer, tackier compounds often feel more secure with thin gloves or bare hands, while firmer compounds can feel more “connected” to the front wheel and may wear longer. The right choice depends on whether comfort and grip security or long-term durability is your top priority.
Where shock absorption is most noticeable
Grip diameter and comfort
Lock-on clamp design and durability
Installation steps and setup tips
1) Prep the handlebar
Remove old grips and clean off adhesive residue so the new grip sits flat. A clean bar helps the grip clamp evenly and reduces the odds of creaks or movement later. Park Tool’s step-by-step overview is a helpful reference for removal and installation details: Park Tool — Handlebar Grip Removal and Installation.
2) Dry-fit and align
3) Set control position
Dial in brake lever angle and shifter placement, then re-check clearance at the inner edge of the grip. Small adjustments here can prevent knuckle rub and help keep wrists neutral on longer rides. For a broader look at hand positions and comfort, see: Sheldon Brown — Handlebars and Hand Positions.
4) Tighten gradually and evenly
5) Safety check before the ride
Care, cleaning, and when to replace
Who these grips suit best
Shop in-stock picks
- Mountain Bike Anti-Slip Shock Absorbing Lock-On Grips 22.2mm Universal
- Cactus Cat Tree Tower with Scratching Post & Condo Nest
- Alviero Martini Prima Classe Women’s Beige Bag with Zip
FAQ
Will 22.2mm lock-on grips fit most mountain bike handlebars?
Yes, 22.2mm is the common handlebar diameter at the grip area on many mountain bikes. Measure the grip section to confirm it’s 22.2mm, and also check control spacing and whether the grip’s end caps match your bar ends and accessories.
Do lock-on grips reduce hand numbness on rocky trails?
They can help by adding cushioning and spreading pressure over a larger contact area, which reduces vibration and hot spots on long, rough descents. Gloves, handlebar sweep, tire pressure, and suspension setup also play a big role in numbness.
How tight should the clamp bolts be?
Use the manufacturer’s torque guidance when available; if not, tighten gradually until the grip won’t twist by hand, then stop. Recheck tightness after the first ride to ensure the clamp has settled without over-tightening and risking handlebar damage.









Leave a comment